 American Easter eggs (Photo credit: Wikipedia)naturally? It’s easy. It’s fun. And it’s good for the environment - and your health (more of those chemicals make it through the shells than you might imagine). Here are some helpful tips and instructions for trying this fun activity in your home this Easter:
Step One: Prepare Your Eggs.
The first step is to prepare your eggs. If you’re a hard-boiled family traditionally then by all means hard boil your eggs. If you’re a poke and blow individual then grab your needle and a hearty pair of lungs. (Note: You can save the eggs you blow out of their shells for scrambled eggs, quiche, French toast or other breakfast entrees. No need to throw them away.)
Step Two: Make Your Dye.
This is the fun and slightly experimental step. It’s experimental because there are many materials you can use to make your dye.
Here are just a few options to consider:
* Purple – Grape juice, Red Zinger tea, red onion skins boiled, red wine
* Blue – blueberries, red cabbage leaves boiled
* Green – boiled spinach, kale or collard leaves (Frozen spinach works very well)
* Yellow – Boiled yellow delicious apple peels or lemon peels, or boiled turmeric
* Orange – boiled orange peels, carrots or carrot juice
* Brown – brewed coffee
* Pink – beets, cranberries, raspberries, cherries, pomegranate juice
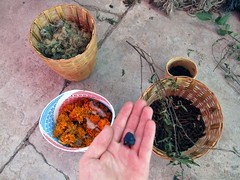 Dye Ingredients (Photo credit: Travis S.)Generally, start with about a cup or two of water and add your dye. For example, if you’re using red grape juice to make purple dye then you’ll add it to a cup of water. If you’re using boiled spinach leaves, you’ll boil the spinach leaves until you have the rich green color you’re looking for. Strain the leaves then add the dye to a cup of water.
 Heat your water and dye until they’re boiling. Add a tablespoon of white distilled vinegar. Remove from stove and place in a container. You’ll use this container to dye your eggs so make sure you can easily place an egg in the dye and remove it. Bowls work well.
Step Three: Dye Your Eggs.
Once you have several dyes prepared, it’s time to have some fun. Using a slotted spoon, carefully lower your egg into your chosen dye. As you would with the old chemical dyes, you’ll want to check periodically to see if your egg has reached the desired color. Remove the eggs from the dye and let dry. Consider drying them gently with a paper towel and then place them in an egg carton. If you are using hard boiled eggs place them in the refrigerator to keep until you’re ready to eat them, hunt for them or decorate.
Feel free to try other ideas for dye materials (you could even make a game of it), and above all, have fun! (For a video demonstration of this process, and some of the results, please be sure to check back Friday.)

No comments:
Post a Comment