Friday, March 29, 2013

Video - Fancy Easter Egg How-To's

If you're looking to make your naturally dyed Easter eggs a bit fancier, this video has some awesome tips for making sparkly eggs, decoupaged eggs, and more - all using natural or recycled ingredients. If your kids are a little older, they'll love these fun advanced Easter egg decorating tips. Check out these fun and easy suggestions, and make your Easter eggs extra special this year!

Decorate Eco Easter Eggs {kids + eco friendly craft}
This easter, be kind to the earth by embellishing eggs and easter baskets the natural way using environmentally friendly items.


Enhanced by Zemanta

Wednesday, March 27, 2013

Eco-Friendly Craft: How to Make Felted Easter Eggs

What’s better than a brightly colored Easter Egg? Why a soft and fuzzy one of course! Felted Easter eggs are fun and easy to make. And you don’t have to worry about a felted egg rotting or going to waste. They’re bright, beautiful and easy to make. Here’s how:

Materials Needed:
roving
Different colored roving (Photo credit: Rakka)
  • Styrofoam eggs – you can find these at your local craft store.
  • Wool roving – you can make your own wool roving or you can purchase prepared wool at your local fabric store. Choose the colors you desire for your eggs. Pastels are nice. 
  • Fine point marker for drawing your design
  • Felting needles – can be found at your local craft store.
Instructions:

Step One: Wrap a piece of felting around a foam egg. Gently hold the egg in one hand while you poke the felting with your needle. The goal is to get the felting to adhere to the foam egg. Gently poke the felting all around the egg. There is a small learning curve here. You’ll eventually learn how much pressure is required to adhere the wool to the egg. Once the piece of wool is attached move on and add another piece of felt. You can switch colors or color your entire egg the same and add other colors on top.

Tutorial felting eggs
Felting eggs (Photo credit: Linda (Pane, amore e creatività))
Step Two: Using a fine point marker, draw a design on your egg. You might want to plan it out on paper first. For example, you might decide to create a circle of smaller triangles around the middle of your egg. Draw those on so you place your felt pieces on your egg accordingly.

Step Three: Cut the wool pieces out of your roving. For example, if you’re adding triangles to your egg you’d cut out the triangles from a new piece of roving. Using your felting needle poke the new pieces of wool into the egg until they’re attached. Once you’re happy with your design you can start a new egg.

Displaying Your Felted Eggs

You have several options to display your felted eggs. You might choose to display them in a glass bowl or basket. You might attach an eye-screw to the top of the egg and hang them. You can add ribbons to the top too.

Making felted eggs is easy. It’s even a craft you can do with your children. Make sure to show them how to attach the wool to the foam egg carefully. You don’t want them to jab the needle through the foam. Consider making felted eggs a part of your Easter tradition. Each year you and your family can add a few eggs to your collection. You might also give them away as gifts, and they make a fun party favor.


Enhanced by Zemanta

Monday, March 25, 2013

How to Have a Zero-Waste Easter Party

In preparation for Easter, we're taking a short break from our Going Organic series - but don't worry - we'll be back next week to wrap up!

This week we'll be sharing some fun and eco-friendly ways to celebrate the holiday in ways that are healthy for both you and the planet. Easter is a time of celebration and renewal. It’s also a great time to embrace earth-friendly practices. If you’re throwing an Easter party, you can make it a green one by having a zero waste party. Here’s how.

#1.  Use E-Vites. Invitations can now be sent via email. There are some extremely useful programs you can use online. These programs allow you to send email invites quickly and easily. They also keep track of who RSVP’d and many offer a message board so people can ask questions about the party. Electronic invitations mean you don’t have to use any paper or ink. They’re 100% electronic. A couple of the more popular ones are Evite.com, and Eventbrite.com. And if you have people you want to invite and they don’t use email, consider giving them a phone call.

Please Recycle Label
Please Recycle Label (Photo credits: www.recyclereminders.com)
#2. Use  Recycled or Reusable Party Ware. Plates, napkins, glasses and all party decorations can be made from recycled materials. You can also use your own every day real or reusable dishes, or if you’re going to have a large party, consider renting dishes. You can also buy compostable party ware, like plates and cups made from corn.

#3.  Make Your Own Decorations. Easter time is spring time and it’s a great opportunity to decorate naturally. That means you don’t have to buy pre-made decorations. Consider using naturally dyed eggs, real grass, and twig branch baskets for decorations. Cut flowers for a spring touch and place them in vases. If you want to create Easter grass for baskets or decorations consider shredding magazines or using vegetable dye on papers in your recycled bin and then shredding them. Beet juice makes a beautiful natural pink color! 

#4.  Make It A Pot-Luck. Instead of cooking everything yourself or getting takeout, consider asking attendees to contribute a dish to the party. It means there’s less work for you and everyone feels as if they’ve contributed to the festivities. Let them know you’re having a zero waste party so they can be sure to bring food in recyclable or reusable containers.

#5. Compost Leftovers. Composting is a great way to make use of leftovers and you can use the finished compost to help indoor and outdoor plants thrive - use it in your sustainable garden to grow great food organically!

Easter party, New Orleans, Louisiana. Coloring...
Coloring Easter eggs. (Photo credit: Wikipedia)
#6.  Play Games. Games make a party fun. Easter egg hunts with real eggs instead of plastic ones are a zero waste game. The kids will love helping dye them the day before! Or have the eggs already boiled and cooled, and make the dyeing part of the party! Charades and scavenger hunts also have zero waste.

#7. Make Natural, Earth Friendly, Crafts. In addition to using games to keep children occupied consider having an earth friendly craft for kids to do. One example might be for children to decorate a tin. You can have seedlings, potting soil and paint on hand. They can decorate the can, choose their plant and take it home. It’s a zero waste craft and a nice goodie to take home from the party. Felted Easter eggs are also a fun craft for kids that they can take home with them - check back for Wednesday's post for how-tos.

#8.  Recycle.  Be sure to recycle anything that cannot be reused. For example, if you purchase soda or juice for the party you can recycle the containers. Or you can use them to create compost scoops, bird feeders, or planters.

Easter is a great time to be environmentally conscious. When you throw a zero waste party you’re not only doing something nice for the planet you’re also getting others involved in the cause. You’re setting a good example for your own family and others. If everyone does their small part it makes a huge difference - plus it can be a lot of fun!

Enhanced by Zemanta

Friday, March 22, 2013

Video - Storing & Preserving the Food You Grow

This video gives you some ideas for storing and preserving foods from your organic garden. From freezing, to canning, to pickling or drying, there are many different methods of preservation that have been used for decades to keep foods fresh for the colder seasons. Some foods may also keep well for many months even without any advanced preservation techniques - all they need is proper storage. Potatoes, beets, cabbage, carrots, and winter squash are some things that will keep well for many months if properly stored. Berries freeze well, and apples keep well in cold storage.

A couple of notes on the video/podcast: I love freezing tomatoes - I have had no problems with this method at all, and it's super easy. My preferred way to freeze tomatoes is to just wash and dice them and freeze them flat in freezer bags. (You can also blanch and peel them before chopping if you don't like the skins.) They are great for winter stews and sauces!

Also, you do NOT need to blanch peppers before freezing. In fact it can make them more mushy, so it's not recommended. Peppers freeze great when just sliced or diced and stored in freezer bags. They keep their color well, and you can just dice them up frozen and add them to soups, sauces, chili, etc. when cooking.

Check it out and see how you can feed yourself year-round with your own organic food!

Storing the Food You Grow - The Wisconsin Vegetable Gardener Visual Podcast (Show 2)
Join Joey & Holly of http://thewisconsinvegetablegardener.com on their new weekly 10 min show for the Gardener on the Go. This week it is all about the food ...


Enhanced by Zemanta

Wednesday, March 20, 2013

Nine Things to Consider When Storing Organic Food

An interesting  thing happens when foods aren’t laden with artificial preservatives or any unnecessary processing.

And that thing is they don’t last as long as less natural options.

Add to that the fact that organic foods tend to be more expensive, and any spoilage can be very costly. So considering all this, here are some things to keep in mind when storing your organic foods.

Produce
Produce (Photo credit: La Grande Farmers' Market)
1. Buy produce in season. Out of season fruits and vegetables generally have a longer travel time, so that can reduce the amount of time you’ll be able to keep them before they spoil. Local produce is also often cheaper and it helps ensure maximum nutrient content. When produce is shipped long distances, it is often harvested just a little earlier than it normally should be. In the winter, seasonal produce tends to keep a long time - things such as beets, turnips, potatoes, sweet potatoes, winter squash, rutabagas, apples, etc. will usually keep for months if properly stored. If you're growing these things yourself, all the better!

2. Wash your produce. Never assume that the lack of pesticides means produce doesn’t need to be washed. Dirt can still have bacteria and other harmful substances.

3. Whole fruits and vegetables can be stored in the usual manner. Use your crisper or storage containers in your fridge. Of course, some produce like bananas, avocados, tomatoes, potatoes and onions shouldn’t be refrigerated. If you cut up any fruits or vegetables, store them in an airtight container in the refrigerator - they will only keep for a couple of days this way, but the convenience of eating will likely cause you to eat them up sooner anyway.

5.  Store grains like flour and pasta in airtight containers. It will keep longer if you store in the fridge (up to 6 months) and even longer in the freezer (up to 1 year).

6. Fresh meat and poultry needs to be used fairly quickly. Large cuts last up to 4 days; items like steaks, chops and chicken pieces last up to 3 days; and ground meats should be used within a day or two.

7. Freeze meats that won’t be used right away. Do the same for excess fruits and vegetables you won’t be able to use. Make sure all products you freeze are in airtight packaging. When using storage containers, make sure to fill them as full as possible, so buy a variety of sizes for best results. Any extra air in your container can contribute to freezer burn. Ziploc freezer bags can be great to have on hand - it is easy to squeeze the air out of them, and they come in a variety of handy sizes.

My tomato-canning endeavors from 2012!
8. Canning is another possibility for organic produce. You can create jams, pickle a variety of items, make compotes, can fruits and vegetables in water and more. Of course, do note that the high temperatures in canning can affect the nutritional quality of your produce. But in general, home-canned produce will have a much fresher taste than any canned goods you could buy at the store. I love canning tomatoes, and I do some every summer - it's really easy, and having my own fresh-tasting, bright and lovely tomato sauce in the dead of winter is wonderful!

9. Dehydrating food can also help with preservation and can be used in a variety of ways. Dehydrated fruits make a great on-the-road snack, instead of processed food items. In addition, dehydrated produce is excellent for emergency kits, camping trips and more.

However, you store your food, include a date on foods you store. This will give you an idea of when foods might spoil and which items should be used first. 

Enhanced by Zemanta

Monday, March 18, 2013

What Are The Disadvantages to Eating Organic Foods?

Are you interested in making the switch to organic foods?  You likely already know the many benefits to eating organic foods, as these benefits are often prominently displayed and advertised.  With that being said, we rarely hear about the disadvantages to eating organic foods. 

English: A hand reaching for organic tomatoes ...
Organic tomatoes at a farmer's market. (Photo credit: Wikipedia)
One of the few disadvantages to eating organic foods is the cost.  Do you know how much most organic foods costs?  If not, you may want to examine those costs before you make the decision to switch to organic foods.  After a closer look, you will see that organic foods often do cost a little bit more money, but if eating organic foods improves your health, it actually may pay for itself over time with fewer visits to the doctor.

Although the cost of organic food may turn you and other hopeful eaters away, it is also important to know that there are many ways in which you can go about saving money.  For example, you can search for organic food sales at your local natural food stores or supermarkets.  Stock up when you see those sales or choose to shop at a store that is known for their everyday low prices on organic foods.  Organic food coupons can also be used. These coupons can be found online, with a standard internet search, in many stores, as well as in weekend newspapers.

In addition to costs, another disadvantage to eating organically is the limited selection of organic products available in some areas. Luckily, not everyone is faced with this organic food eating disadvantage.  Often  those who live in small cities and towns find it the hardest to buy organic foods.  With that being said, it doesn’t matter whether you live in a small town or a huge city, there are still a number of different ways that you can go about buying organic foods.

English: Sign at the Sonoma Farmer's Market, S...
Sign at the Sonoma Farmer's Market, Sonoma, California (Photo credit: Wikipedia)
In my opinion the absolute best way to buy organic foods is by going directly to the source - organic farmers.  You can usually find organic farmers in just about any size town, if you know where to look, and is the best possible way to get your organic fruits and vegetables, as well as, in some areas, even meats and dairy. Visit your local farmer's market and start getting connected.

You can also search for specialty organic food stores by using online business directories, your local phone book, or by asking those that you know for recommendations.  The internet can also be used to shop online for organic foods - just be aware of shipping costs.

Although there are a few disadvantages to eating organic foods, it is also important to remember the benefits or advantages to doing so as well.  For starters, organic foods are all natural and safe to eat.  You won't have to worry about potentially harmful chemicals, additives, and pesticides.  Organic foods also benefit the overall environment and the economy.

But there is one disadvantage we haven't discussed yet, and that is the tendency of organic foods not to keep as long, since they don't contain artificial preservatives, and typically aren't as highly processed. For some ways to keep your organic food fresh during storage, be sure to check back for Wednesday's post.
Enhanced by Zemanta

Friday, March 15, 2013

Video: Build A Chicken Coop - Step-By-Step

This short video demonstrates building a pretty nice and fairly complex small chicken coop. It goes pretty fast, but will give you a good idea of another way to build a backyard chicken coop to house your chickens.  For some more plans, see link below video. Now is a great time to start getting outdoors, and a good time to get some chickens. They tend to lay more in the summer, so spring is a good time to get everything set up and get them acclimated to their new home - you'll be eating fresh healthy eggs in no time!

How To Build a Chicken Coop
Watch more How to Raise Farm Animals videos: www.howcast.com Subscribe to Howcast's YouTube Channel - howc.st Construct a chicken coop in your backyard using the steps described here. Howcast uploads the highest quality how-to videos daily! Be sure t...


Product Box

Enhanced by Zemanta

Wednesday, March 13, 2013

How to Build a Backyard Chicken Coop

Before you begin building your backyard chicken coop, there are some things you'll need to consider. Here are some easy steps to building your own backyard chicken coop.

English: Traditional chicken coop
Traditional chicken coop (Photo credit: Wikipedia)
1. Determine the coop's purpose. If the coop will only be where the chickens sleep at night, then it can be very small and minimal. If the chickens will spend time in the coop to lay eggs and nest, it will need to be a bit more elaborate.

2. Decide on how many chickens you plan to keep. For most families, 2-4 chickens is plenty.

3. Plan the location of the coop. Putting it near your house helps keep it warm and discourages predators. This also means you have easy access to it, which can be very helpful. Keeping it further from the house is fine, too. A coop can get unsightly and smelly. (Regular cleaning keeps it from smelling bad, though.)

4. Now to build the coop. A coop needs ventilation but not drafts. It needs perches and bedding. A mixture of pine shavings and straw does well. Chickens are not picky - thick sticks, sideways 2x4s, and even old broom handles work fine for perches.

5. First, build a frame. Lay 2x4s on the ground to make a rectangle, and then attach them at the corners using nails or screws. You can skip this step if you begin with a wire structure such as an old dog kennel. Then you need only cover the kennel with plywood.

6. Nail or screw 2x4s vertically at the four corners. Make two of the 2x4s shorter than the other two, so that the roof will slant. You can decide how you want it to slant - sideways or back.

7. Next, you'll need a jigsaw and four sheets of plywood. Cut the sheets of plywood so that they are the correct height and width to attach to the vertical 2x4s. You will need to cut 2 of the sheets at a slant so that they will attach to the tall and shorter 2x4s.

8. Cut a hole for the door, and save the piece you cut out.

9. Cut two small windows along the top of the plywood and save the pieces you cut out. Using a staple gun, attach hardware cloth or chicken wire over the window holes.

English: An A-frame chicken coop in a Portland...
An A-frame chicken coop in a Portland, Oregon backyard. Dimensions are 4 feet tall, 8 feet long, and 6 feet across. The metal device in the front is their 3-gallon waterer. (Photo credit: Wikipedia)
10. Attach hinges to the window pieces and the door. You will need to rig up a latch of some sort to keep the door shut and locked. The window holes will need to be propped open during the day and on warm nights, and then shut when it's cold. Position the hinges with this in mind.

11. Attach perches with nails or screws. You may even want to cut holes in the walls and slide the perches through.

12. Nail roofing tiles to the piece of plywood you are using for a roof. Using the jigsaw, cut the tops of the vertical 2x4s at a slant. Lay the roof across the top of the coop - it should be slanted without much of a gap. Nail it into place.

There it is - a simple chicken coop that you built, yourself! It's pretty basic, but it's really all you need. Of course you can also buy a chicken coop, or get a kit, but in most cases the instructions above should provide the basics that you will need.


Product Box


Enhanced by Zemanta

Monday, March 11, 2013

Backyard Chickens: Tips for Getting Started

Welcome back, and I do apologize for the lack of posts last week - after week's lack of sleep, I was struck down with the flu - the first time in almost 15 years! And it was NOT fun. Thank goodness that's over, and today it feels like spring, and I'm back with some more great stuff about living the organic sustainable life! This week's topic is backyard (or city) chickens!

Chickens in the chicken tractor at an organic ...
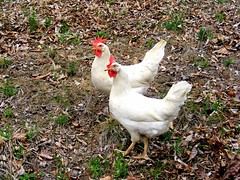
Chickens in the chicken tractor at an organic farm. (Photo credit: Wikipedia)
A few years ago, it seemed a little bizarre that someone would keep chickens in their backyard. These days, no one bats an eye at this inexpensive and rewarding way to feed the family.

There are a few reasons why people raise chickens:

- Obviously, for the fresh eggs
- Natural removal of weeds and bugs
- To save money
- It’s pretty easy, once you get started

Of course, always check local laws about raising chickens in your yard and ensure you’re in compliance before you start. You can purchase chickens from a variety of suppliers. You can actually hatch eggs or raise chicks, but they are more work than just getting already grown chickens.  Keep your climate in mind, the egg size you want and whether or not the chicken will be raised strictly for eggs. You can use the handy tool here to select a breed appropriate for your purposes:  http://www.backyardchickens.com/products/category/chicken-breeds

One chicken will lay about 4-6 eggs per week, but they generally lay less in colder months, so keep this in mind when planning their space.

To raise chickens, you can have them running free, but a coop provides protection from the elements and predators, so make a plan to build one. A coop should provide about 2-3 square feet per hen, and for the outside area, each hen should have about 5 square feet of space. In a coop they can peck each other without enough space, so never try to cram them in.

As you build, keep seasonal temperatures in mind. Make sure air can get through in summer and keep it from going through in winter. You can even use a tarp to keep it warm, and remove it as needed. Use a slanted roof to let rain roll off, if you live in a rainy area.

Inside the coop, use pine shavings for the flooring. This makes it comfortable for the chickens and easy for clean up as you scoop out and replace the shavings. Provide plenty of roosting space. They will also need nesting space. Wooden boxes work well for this.

Chickens
Chickens ranging. (Photo credit: Allie's.Dad)
You can feed chicken store-bought feed pellets. They also love vegetable scraps, bread and bugs, and they'll love foraging around outside as much as possible. Having access to grass and bugs will also cause them to produce much healthier and more nutritious eggs, so make sure they do have access to the outdoors! Give them fresh water regularly, keep their area clean and you’ll have happy chickens. Check on them daily and collect their eggs each day as well. Eggs can go bad quickly in warm weather and in cold weather; they can freeze, expand and crack.

If you have young children, always supervise them with the chickens. Chickens will peck to defend themselves and although it won’t take a child too long to learn this, you need to be there to ensure proper handling of the chickens. In addition, live poultry can carry salmonella. Everyone should wash their hands thoroughly and immediately after handling the chickens or being in your chicken’s area.

Overall, having chickens can be a very rewarding experience and many people come to see chickens as part of their family. It is a long term commitment because chickens can live for 12 years or more. Just care for them, protect them and they will serve and feed you well!

On Wednesday we'll discuss building a chicken coop in more detail, so be sure to check back!
Enhanced by Zemanta

Friday, March 1, 2013

Video - Growing Your Own Food In Suburbia

This is a pretty cool video about the benefits of growing your own food - no matter where you live. Instead of a lawn, John grows an amazing amount and variety of vegetables outside his small suburban home. It really is inspiring to see how much food you can grow on just 1/10 of an acre with smart and creative use of space! From saving money, to improving the quality of your health through fresh and nutritious food, to environmental benefits, growing your own food is an amazingly beneficial way to have a positive impact on your life and the world around you.

Suburban Homesteading Edible Victory Garden Edible Estate on 1/10th of an Acre
John shares with you his suburban homestead where he is growing the majority of his food. Remove your lawn and grow food. Start your victory garden today! See what he has done with only 1/10th of an acre of land.


Enhanced by Zemanta